Thursday, March 28, 2013

Tie Dye with Acryllic Paints

Have you ever tie dyed anything?  I haven't because I never wanted to mess with the dyes.  But the other day Chablis found instructions someplace online for doing tie dye with acrylic paints.  Yes, you read that right - acrylic paint!

We gathered the necessary materials
  • clean white tee shirts
  • spray bottle with water
  • assorted acrylic paints
  • gloves
  • margarine containers and plastic spoons
  • rubber bands
  • newspaper and tin foil
We laid the tee shirts out on some newspaper that was covered with sheets of tin foil....


Lightly sprayed the front and back of each shirt with some water...
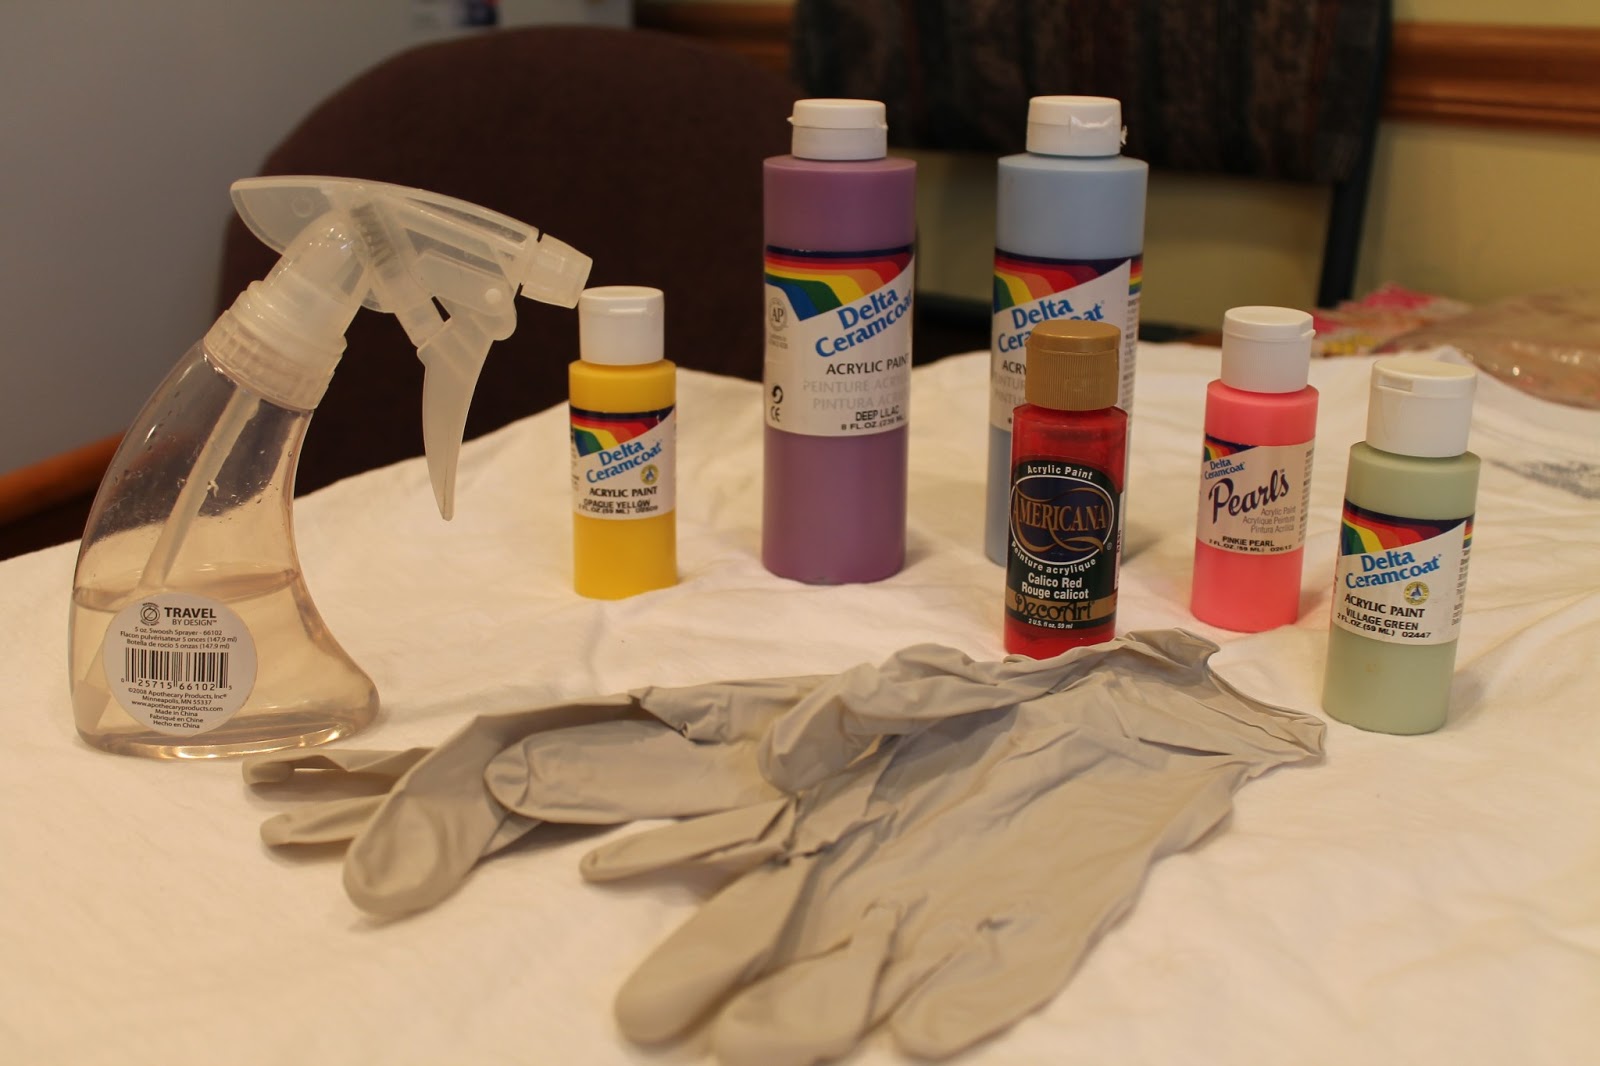

Squirted acrylic paint into margarine containers and diluted it with some water.... 


Then take each tee shirt and start to twist it into a circle....


Take rubber bands and stretch them over the round bundle....


Re-spray your bundle to make sure its slightly damp....


Start drizzling paint over different sections of your bundle...


Be sure to thoroughly cover the front, the back and the sides with the paint.  This part was fun!


When finished, wrap your tee shirt bundle in a bag and let it sit for about 6 hours.  This is to let the paint totally seep through the tee shirt material and cover it well.


Then I took a large garbage bag and opened it up and spread it out on a table.  I took the tee shirt out of the bag and spread it out over the trash bag.  I actually set mine up on a table in my office, underneath my ceiling fan to help it dry faster.  I kept it like that for several hours and then flipped the tee shirt over and let it dry overnight.  If you don't have table space, lay it on a trash bag in your bathtub overnight to dry.  The trash bag is important so the paint doesn't stain whatever your shirt is laying on!

Ok, the next morning we tossed the dry tee shirts into the dryer and let it run for about half an hour to set the dye.  We didn't do this step the first time we dyed a shirt and when we washed it, the colors faded.  This time we set the dye for half an hour and then we washed the tee shirts in the washing machine on a quick wash cycle, re-dried them in the dryer and they were finished!


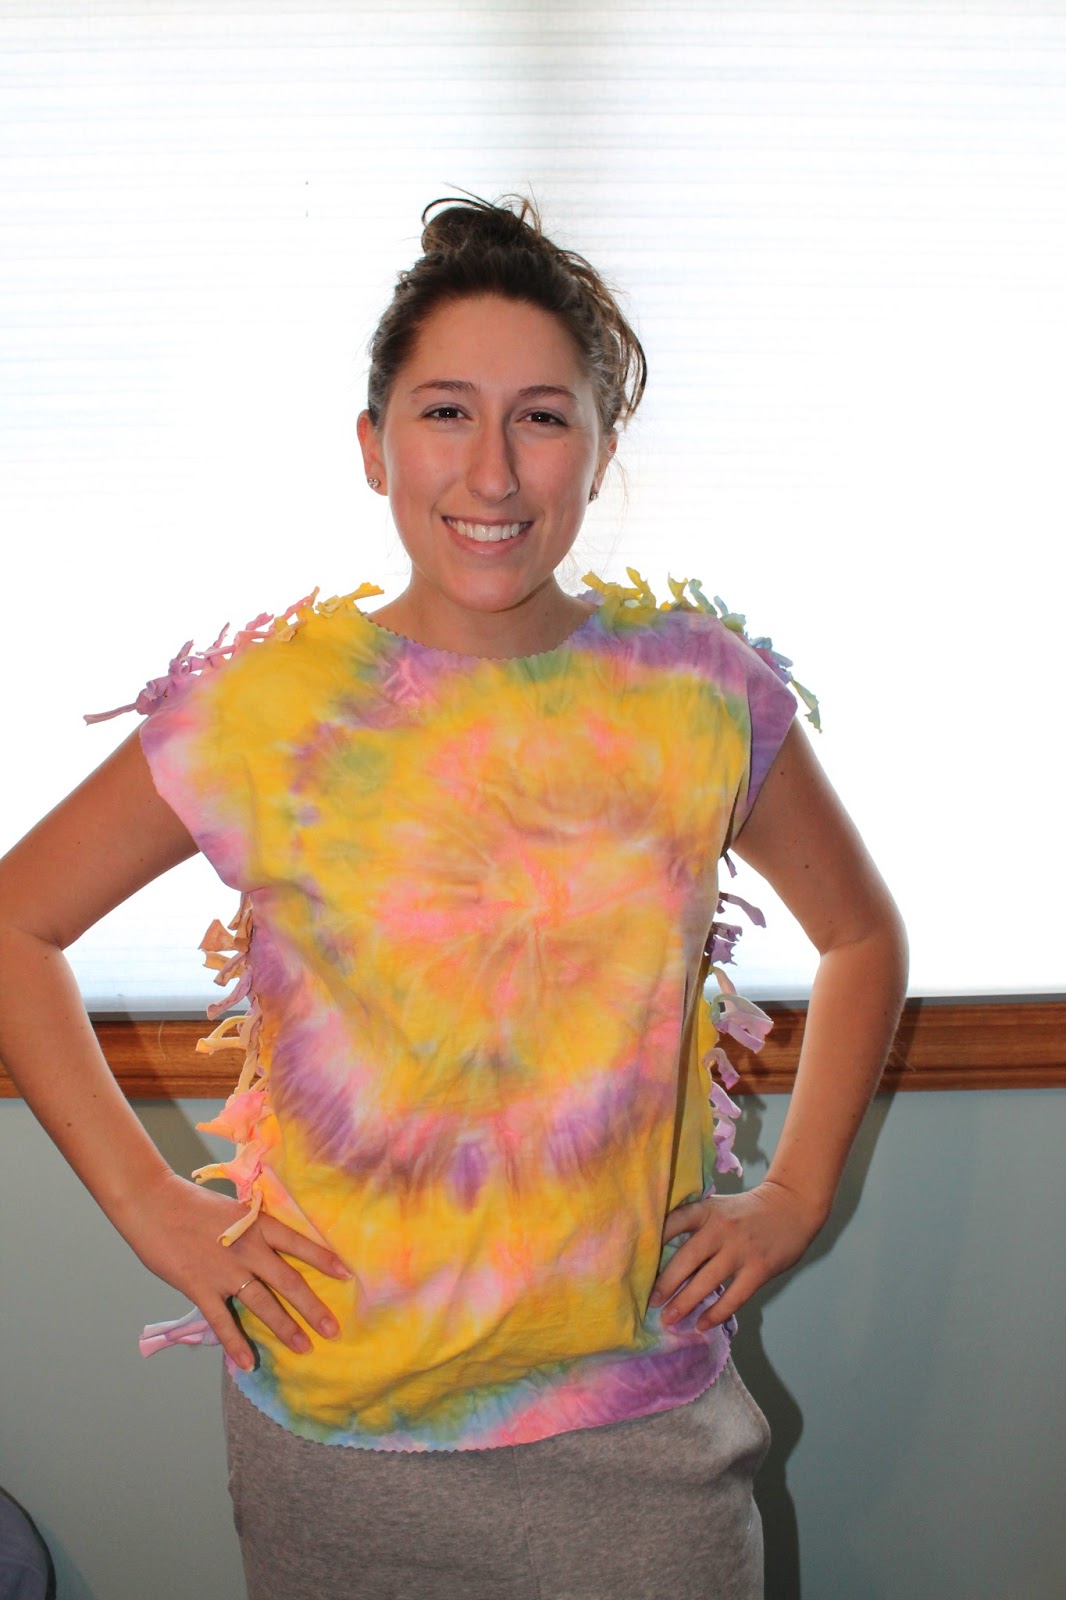
But we decided to take it one step further and decorate them a little more.  We took my quilt cutting tool and cut some slits across the back of the tee shirts, cut out the neck holes a little and also cut off the sleeves.  Make sure you place a piece of cardboard inside the shirt before you do this!!  This is what my shirt looks like....


Chablis did 2 shirts.  On this one she also cut strips along the bottom hem and then tied knots into them....


And on this tee shirt she got really fancy.  She cut slits across the top shoulders and along the sides and then tied each strip together....


Aren't they cute?  They are perfect to wear with jeans or shorts or as a beach cover up.  They were a little time consuming, but very fun to make.  I would definitely do this again.  The best part was that we had everything on hand except for the tee shirts and we just bought some cheap mens tee shirts at Wal-Mart.  If you're looking to do a fun project with your kids, give this a try!

Tuesday, March 26, 2013

Getting Ready for Easter

Since Easter is coming up quick I thought I'd share some old family Easter photos taken when I was a kid.

In this one I love the little hat and collared jacket....


Check out the ankle socks....
 
 
 My sisters and I....

Does anyone remember wearing white gloves to Church when they were a kid?  We did every week - not just for Easter...

 
I love this photo of me holding this giant bunny rabbit.  I'm guessing that I was about 3 years old...
 
 
And here I am XX years later (you didn't think I was actually going to spill those beans, did you?)  holding the same rabbit.  She's in pretty good shape except for her lace apron which is falling apart.   My husband doesn't like this rabbit any more than he likes the huge stuffed Santa I have either.  So of course the rabbit turns up on his sofa or under his blanket from time to time....


Please share some childhood Easter photos this week if you have them!

Saturday, March 23, 2013

Mom Hitting the Trails

Many of you may remember that my mom had her first of two knee replacement surgeries back in January.  After intense physical therapy and sheer determination, she is ready to rock and roll!  She just got the all-clear from her doctor and guess what?  She's back to 100% in her re-built knee.  Way to go Mom!  She immediately declared that she was ready to get out and hit the caching trail.

We started light, with a visit to the Orchid Farm the other day and a few easy caches that didn't require too much walking yet.  She didn't even care that it was only 14 degrees out.  She showed us no mercy and growled "dress warm!"


We went to a park near the Orchid Farm......


Mom was at the top of her game - She spotted 2 caches before I did and they weren't easy park and grabs either. I think she was just showing off.....


Her other knee is scheduled for October.  Before I know it, she'll be hitting the trails like Emma Gatewood, the first woman to hike the Appalachian Trail.  Emma hiked it 3 times and she was 75 years old the last time she did it.

(google photos)

You go Mom - I'm glad you're back!!


Thursday, March 21, 2013

Orchid Photos by Chablis

The other day we took a drive to Villa Park to go to Hausermann's Orchid Farm.  The last time we were there was 2 years ago and I posted about it here. 

It was a cold Chicago day, about 14 degrees, but it was toasty warm and sunny in the greenhouses....


Even Snoopy had a good time checking out the flowers....


Chablis took a bunch of pictures this time so I asked her to do a guest post for me highlighting her favorites ....

I had the best time taking pictures at the orchid farm, the flowers were outrageously beautiful. I ended up taking 150+ photos!! And trust me I could have taken a lot more but I tried to restrain myself <LOL> I chose a select few to share will you all - hope you enjoy!

Chablis


I think this one looks like a mouth with 2 front teeth and a tongue.....


Here's to sunny days and warmer temperatures!

BlogLovin

<a href="http://www.bloglovin.com/blog/5190797/?claim=h9nfsqxd7x9">Follow my blog with Bloglovin</a>


Google Reader is shutting down.  Follow me on BlogLovin.  So far it seems pretty good!

Wednesday, March 20, 2013

Book Review - Happy Home

This month I had the pleasure of reviewing HAPPY HOME: Everyday Magic for a Colorful Life by Charlotte Hedeman Gueniau and published by Rizzoli New York.


Just released on March 19th, Happy Home is the answer for anyone who wants to add more color into their home décor.  Charlotte Hedeman Gueniau is the founder of Rice, Denmark's acclaimed home furnishing company.  This book explodes with color and ideas that are not only bright and cheerful, but easy to follow and duplicate.


Charlotte shows us how easy it is to improve our surroundings by using colored accessories, paint, and adding fabrics with patterns and textures.   I never realized how simple it could be to change a room by including colored throws and pillows or hand painted furniture.

I like my home to feel like a happy place and the chapter entitled Smiling Spaces gives some great examples on how to create a space that is fun, colorful and light.  Want to mix heirlooms with kitschy souvenirs?  Would you like to showcase a special corner or piece of furniture?  Charlotte shows you how to do this whether you're a free spirit or have a more traditional approach.  I wanted to step inside this book and live there from the moment I began thumbing through the pages.

I really appreciated the section on how to have fun with your walls.  Practical and easy suggestions run from painting one wall to all the walls, using wall paper or decorating the walls with different items...


I'm a huge fan of quilts, cushions and pillows and this book delighted me with all the different photos and examples on how to use these items to my best advantage.  Is there anything more inviting than a soft old quilt tossed on a chair?  Who wouldn't love to sink back into a sofa lined with plump and colorful pillows?

I loved the colors she chooses for walls and I think plum may be my new favorite color.  I wish you could see the rich purple walls on page 55 or the gorgeous mint walls paired with dark purple sofas on page 57.  They are stunning! 

The section on hallways was interesting because they showed two photos of the same hallway painted in different colors and it was such a startling difference.  It's really an excellent example on what a coat of paint can accomplish.

Even if pops of color aren't your thing, you will find loads of practical information in this book.  I enjoyed suggestions like mixing materials to keep things interesting, choosing one piece of furniture to take center stage, or providing unexpected elements.  Try placing a book shelf behind a sofa, add glamour by using silk and velvet fabrics, or use metallic elements to add a hint of richness. 

Happy Home is filled with creative ideas on simple furniture covers, dressing up lampshades, using fabric on pillows, adding crocheted items, using trays, and creating a quiet space.  Something as simple as re-covering a pillow in new fabric can change the whole look and feel of a room. 

The chapter on the kitchen area made me want to invite a bunch of people over and start cooking.  There are plenty of ideas for.....
  • lighting
  • seating
  • tableware
  • cooking and hanging out
  • no matter if your kitchen is small or large - there's a way to make it work!


Need ideas for your bedroom?  Starting on page 104 you will get tips on how to successfully mix books, jewelry, storage and headboards with a background of color, textiles and light.   Do you have small children or teens?  Get some fab ideas for cozy and comfy or hip and cool bedrooms that any child would love to call their own.

New bathrooms can be costly and expensive, so the chapter called "Bathing in the Senses" was particularly good.  It contains wonderful ideas on how to keep your bathroom tidy and organized.  A nice advantage to a small bathroom is the ease with which you can re-paint the walls and decorate with new towels and rugs.  I was surprised at the number of simple improvements I could easily make myself by using some of the tips from the book.

Other fun sections include entertaining, back yard space, camper homes, balconies, and office spaces.  The Happy Home is 190 pages of pure color and fun, yet they are practical ideas.  If you're like me and you have a hard time coordinating color and design, the Happy Home is chock full of suggestions and advice that is easy to copy or build upon in ways to make your own.  If you're more comfortable with your decorating skills, there is still a lot to be learned between the pages.  At the very least, you will love the bright, bold colors and fun ideas.  It was sheer pleasure reading this book and I couldn't help but smile looking at all the gorgeous photos.  I also couldn't help but think "Hey, I could do this, or this, or that."  The Happy Home succeeded in making me feel happy just looking through it and gave me courage to try some of the techniques mentioned.  It will be fun to see what I can do with the techniques I learned from this book.

(all photos property of Rizzoli Publishing.  Do not reproduce)I was provided an advance copy of the book for review purposes and asked to give an honest review. All opinions are my own.

Two other excellent Rizzoli publications that I've reviewed are:  La Cucina Italiana and  AUDUBON’S AVIARY: The Original Watercolors for The Birds of America.
Related Posts Plugin for WordPress, Blogger...