Showing posts with label cutting board. Show all posts

Monday, August 10, 2015

Re-purposed Tool Boxes and Cutting Boards


In between our trips back and forth to the lake I've been trying to get caught up on some of my re-purposing projects.   I have so much stuff to do and I can't seem to get caught up.  I can't even show you the before's on most of this stuff because I lost a ton of photos when my laptop crashed back in June.  Here's a shot of one of the wooden tool boxes - I picked up 2 of them and refinished them.


I think this is such a fun way to re-purpose old tool boxes and give them new life....


They are cute little crates for coffee service, napkins and silverware, vases or even flowers....


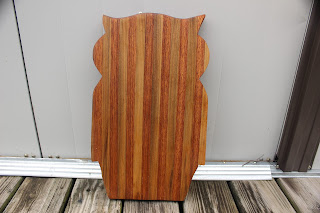
 The Owl cutting board is super thick and heavy.   I sanded it down and then stained it with coffee grounds....

I love the multiple colors and a coat of coconut oil really brings them out....


The pizza server was also sanded smooth and stained with coffee grounds before I stenciled the word Pizza on one side and then used my wood burning kit on it....


Coconut oil on this brought out the nice patterns and colors of the wood.


 All items are for sale at The Hodge Podge in Benton, KY.

Linking up with....

Monday, November 3, 2014

From Failure to Fab

Do you remember the repurposed cutting board failure I had a couple of weeks ago?  Here's a picture of the sad finished product.  Jump back here if you want to read the original story.


Well, I pondered the problem, asked for advice and searched Pinterest.   The first thing I tried was to get an ink pad refill tube.  I dabbed liquid ink onto the surface of the Bacon Press and tried pushing it down onto the board, but that didn't do anything except get my hands full of ink.  I was happy that the ink easily washed off of the Bacon Press....


So on to plan B.  I ran over to the office supply store and looked for some carbon/tracing paper.  When I couldn't find it, I asked one of the store employees if they sold carbon paper.  He looked at me like I was speaking a foreign language.  Cripes, did that make me feel old - does anyone else remember carbon paper???  You know, from back in the day when we used typewriters and wanted to make multiple copies.   Anyway, after a little searching, we came up with a box of carbon paper....
 
 
I went back home with my precious box of carbon paper.  I'm thinking that 25 sheets of it will probably last me the rest of my life.  I got out a piece of parchment paper and taped it to the front of the bacon press and took a pencil and lightly scribbled across it so I could transfer the outline of the bacon press onto the paper.  Then I laid the transfer onto the cutting board and slipped a piece of carbon paper between the parchment and the board.... 
 

Next I took a pen and just traced the outline of the transfer onto the board.  I was actually feeling pretty pleased with myself at this point if you want to know the truth.

 
Finally, I took my wood burning tool and just burned along the pen lines....


Once I finished wood burning the board, I did a light staining with coffee grounds, cleaned it up and then coated the entire board with some coconut oil.   Here it is, all finished and ready to use or display!  Honestly, I was pretty happy that it all worked out.  Don't you just love it when you can turn a former failure into a fun finished product?


Linking up with...


Monday, September 1, 2014

How To Repurpose a Cutting Board

One of my favorite things to do is find old wooden cutting boards at estate sales.  I love to bring home these sometimes well used boards, clean them up and repurpose them.  Here's 2 that I recently nabbed.  This one had an extremely ugly fruit pattern painted on one side....


And this pig was too cute for words, but it was well used and a bit grimy.  Both boards needed quite a bit of work.

First up was to completely clean and disinfect them with bleach and lots of hot soapy water, before sitting them out in the sun to air dry for a couple of hours. Then I sand them down to remove the top layer of wood and to remove any knife-cut marks on both sides.  If the cutting board didn't have a hole in the top to hang it, I just drill a hole with a power drill at this time.

I generally use a stencil from our Cricut to stencil on a design or letters.  Then I get out my wood burning tool and hand burn the wood.  Sometimes I like to use a little natural stain to darken the wood.  My favorite method is to just use coffee grounds.  I dump that mornings grounds onto the board and scrub it into the wood with my fingers.  It's amazing what a nice rich color this can give to the wood.   Afterwards it got another good scrubbing and then oiled with coconut oil.  Finally, I added a piece of twine to the hole so I can hang it in the kitchen. 

I made this board especially for my friend Dolly from Dolly's Designs in gratitude for the beautiful aprons she makes for me.  She is also an avid cook and you should check out her cooking blog as well.


Your cutting board is totally usable, but if you don't feel comfortable using a garage sale item,  you can just display it in your kitchen. One word of advice - hand wash it, don't put it in the dishwasher. I had a  board crack apart after I stuck it in the dishwasher.


I am in love with this pig cutting board.  Wouldn't a group of them look adorable hanging in the kitchen?

Oink, oink!!

Linking up with....
#Best of DIY

Thursday, May 8, 2014

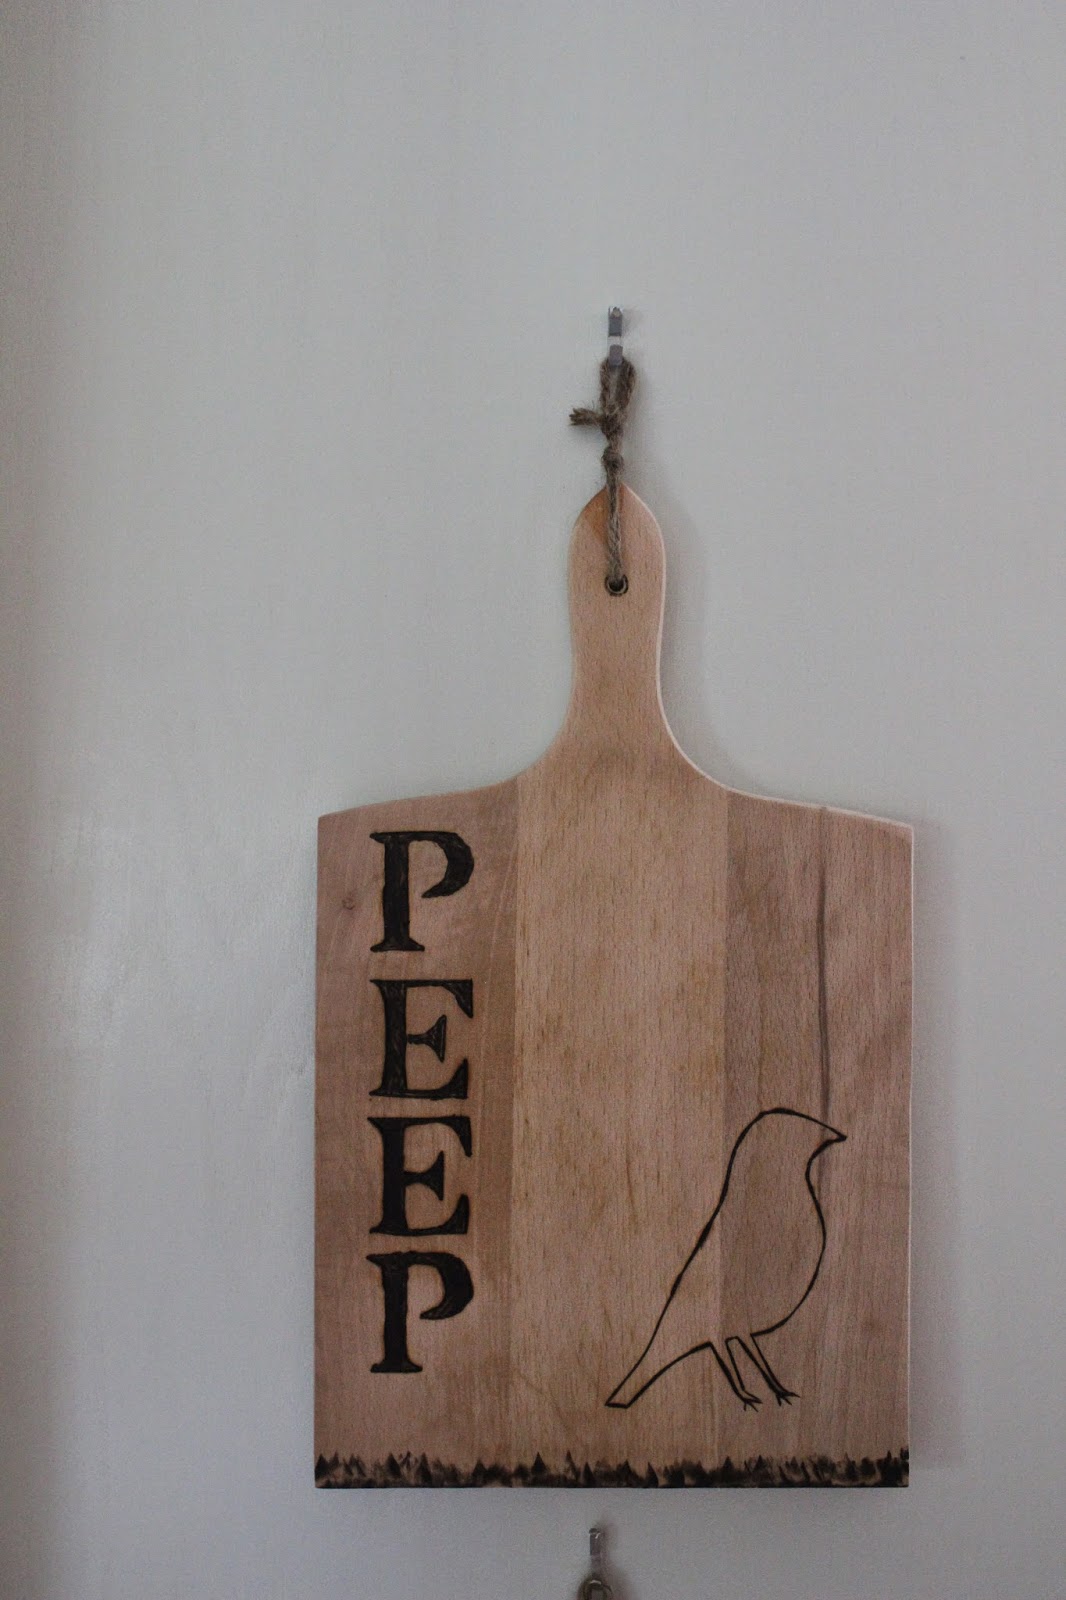
Repurposed Bird Cutting Board

Last week when we were picking up items at estate sales, one of my little treasures was an ugly cutting board.  You can see what it looked like in this post here.  One of my favorite new things to do is repurpose used cutting boards.  I see so many old ones at garage sales - you know, the ones with thick heavy wood and some of them are cut into cute shapes.  Most people will just pass them by because they are well worn and scarred with knife cuts from frequent use.  But that doesn't deter me and they are usually priced for less than a dollar.

I take the cutting board home and wash it really well with hot soapy water and a little bleach and then I run it thru the dishwasher.  Afterwards I'll lay it outside in the sun to dry really good for a day or 2.  Then I take my electric sander and sand down the entire board, removing years of use, cuts, gouges, and ugly paint jobs, giving it a nice, clean finish.   

I'll have Chablis make me some stencils on her Cricut machine and outline whatever I want with a pencil.  I heat up my wood burning tool and start burning.  The ugly painted board with the fruit on it turned out to have some beautiful wood underneath with a couple of pretty natural stains.  I washed it down really good again and let it dry, added a piece of twine to hang it and here it is.  It looks like brand new....


The new bird cutting board is now hanging at the lake house with the other board I did last week.  Now I'm on the lookout for a slightly smaller board to complete a set of three to hang and use.

 
Linking up with....

Tuesday, April 15, 2014

Repurposed Cutting Board

Do you remember when I picked up this great, but extremely beat up, cutting board at an estate sale?  It was badly scratched and I could tell it had been used a great deal.  But that's not a bad thing.  Check it out...


The thing I liked about it was that it had good color, a great shape and it was super heavy.  A light bulb went off in my head and I decided to spend the 50 cents on it and take it home.
 
The very first thing I did was scrub the heck out of it with soft scrub and bleach, then I ran it through the dish washer and then I set it outside to dry really good in the sun.  After it had dried I took my electric sander to it and completely sanded down both sides and all the edges.  After another good scrubbing, I pulled out my wood burner and did this....


Afterwards I decided to tie some twine on it and now it's hanging in the kitchen at the Lake house.  Kind of awesome, don't you think?  I'll be on the lookout for more of these.


Related Posts Plugin for WordPress, Blogger...