
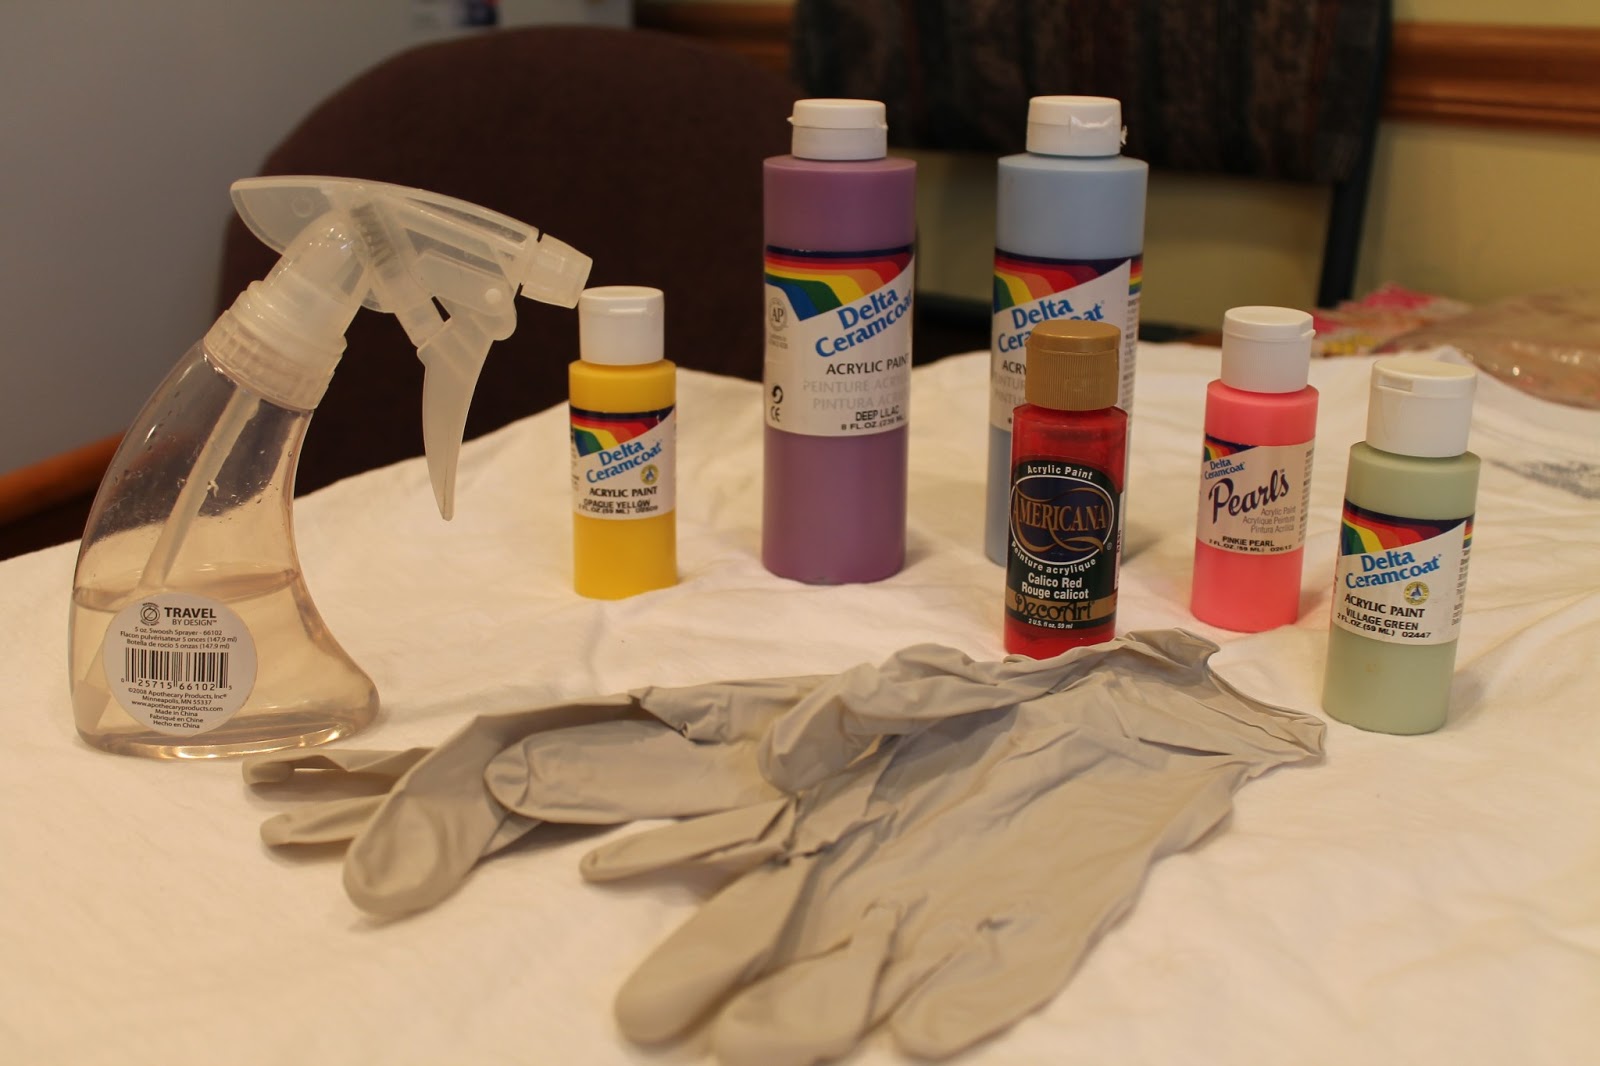
We gathered the necessary materials
- clean white tee shirts
- spray bottle with water
- assorted acrylic paints
- gloves
- margarine containers and plastic spoons
- rubber bands
- newspaper and tin foil

Lightly sprayed the front and back of each shirt with some water...
Squirted acrylic paint into margarine containers and diluted it with some water....


Then take each tee shirt and start to twist it into a circle....


Take rubber bands and stretch them over the round bundle....

Re-spray your bundle to make sure its slightly damp....

Start drizzling paint over different sections of your bundle...

Be sure to thoroughly cover the front, the back and the sides with the paint. This part was fun!


When finished, wrap your tee shirt bundle in a bag and let it sit for about 6 hours. This is to let the paint totally seep through the tee shirt material and cover it well.

Then I took a large garbage bag and opened it up and spread it out on a table. I took the tee shirt out of the bag and spread it out over the trash bag. I actually set mine up on a table in my office, underneath my ceiling fan to help it dry faster. I kept it like that for several hours and then flipped the tee shirt over and let it dry overnight. If you don't have table space, lay it on a trash bag in your bathtub overnight to dry. The trash bag is important so the paint doesn't stain whatever your shirt is laying on!
Ok, the next morning we tossed the dry tee shirts into the dryer and let it run for about half an hour to set the dye. We didn't do this step the first time we dyed a shirt and when we washed it, the colors faded. This time we set the dye for half an hour and then we washed the tee shirts in the washing machine on a quick wash cycle, re-dried them in the dryer and they were finished!

But we decided to take it one step further and decorate them a little more. We took my quilt cutting tool and cut some slits across the back of the tee shirts, cut out the neck holes a little and also cut off the sleeves. Make sure you place a piece of cardboard inside the shirt before you do this!! This is what my shirt looks like....


Chablis did 2 shirts. On this one she also cut strips along the bottom hem and then tied knots into them....

And on this tee shirt she got really fancy. She cut slits across the top shoulders and along the sides and then tied each strip together....

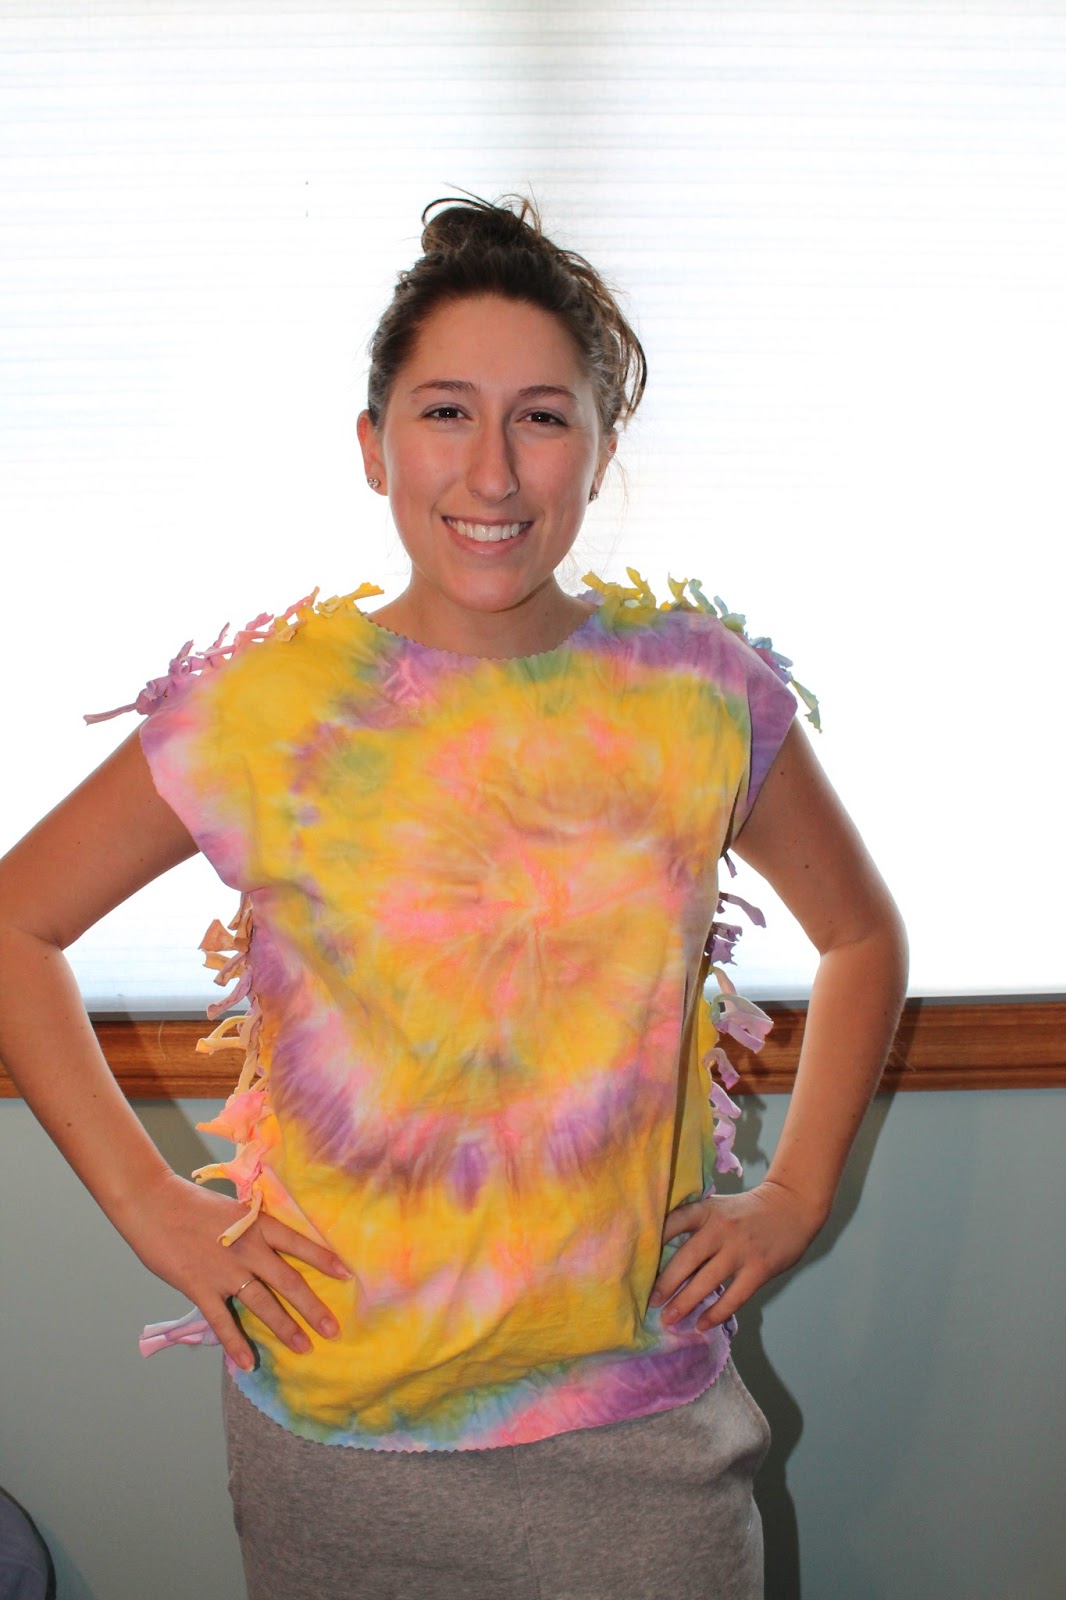
Aren't they cute? They are perfect to wear with jeans or shorts or as a beach cover up. They were a little time consuming, but very fun to make. I would definitely do this again. The best part was that we had everything on hand except for the tee shirts and we just bought some cheap mens tee shirts at Wal-Mart. If you're looking to do a fun project with your kids, give this a try!

What a great way to do tie dye. I remember making tie dye t-shirts at Girl Scout camp in my younger days. Giving a bunch of girls free access to vats of permanent dye - those leaders were brave!
ReplyDeleteLOL - I'm afraid I would have gotten more dye on me than the shirts.
DeleteKim~
ReplyDeletethanks for stopping by!
always great hearing from you..
and to see what you've been up to..
this was interesting..
might try it.☺
come again.. anyttime!
love and hugs.. Loui♥
Thanks Loui. You looked so happy to see your daughter. :-)
DeleteVery interesting! I never tried traditional tye dye for the same reason. Will keep this method in mind!
ReplyDeleteI will have to try this technique with my daughter. Thanks for sharing :)
ReplyDeleteLaura
Very Creative. I Enjoyed Your techniques with the cutting & tyeing the sleeves & the side's in knots. Thanks (-:
ReplyDeleteWhat a fun project--my daughter would love this and I always have acrylic paints on hand. Thanks for linking up!
ReplyDeleteI'll have to try this with my grandkids!
ReplyDeleteDoes the acrylic paint fade after washing the t shirts?
ReplyDeleteDoes the acrylic paint fade after washing the t shirts?
ReplyDeleteNo, its been fine.
Delete