Monday, July 26, 2021

What's in my Backpack?

 I usually keep my backpack loaded up and ready to go either hiking or geocaching.  It makes it a lot easier to pick up and go at a moments notice.  All I usually have to add is a couple water bottles and something to eat.  Let's take a look at what I have....

My backpack is a SwissGear brand.  It's nothing fancy and it's not made for heavy duty backpacking because it's on the smaller size.   I'd call it more of a "day" pack.  Clipped to it is my Traveling Snoopy.  He goes everywhere with me and I usually like to take photos with him.


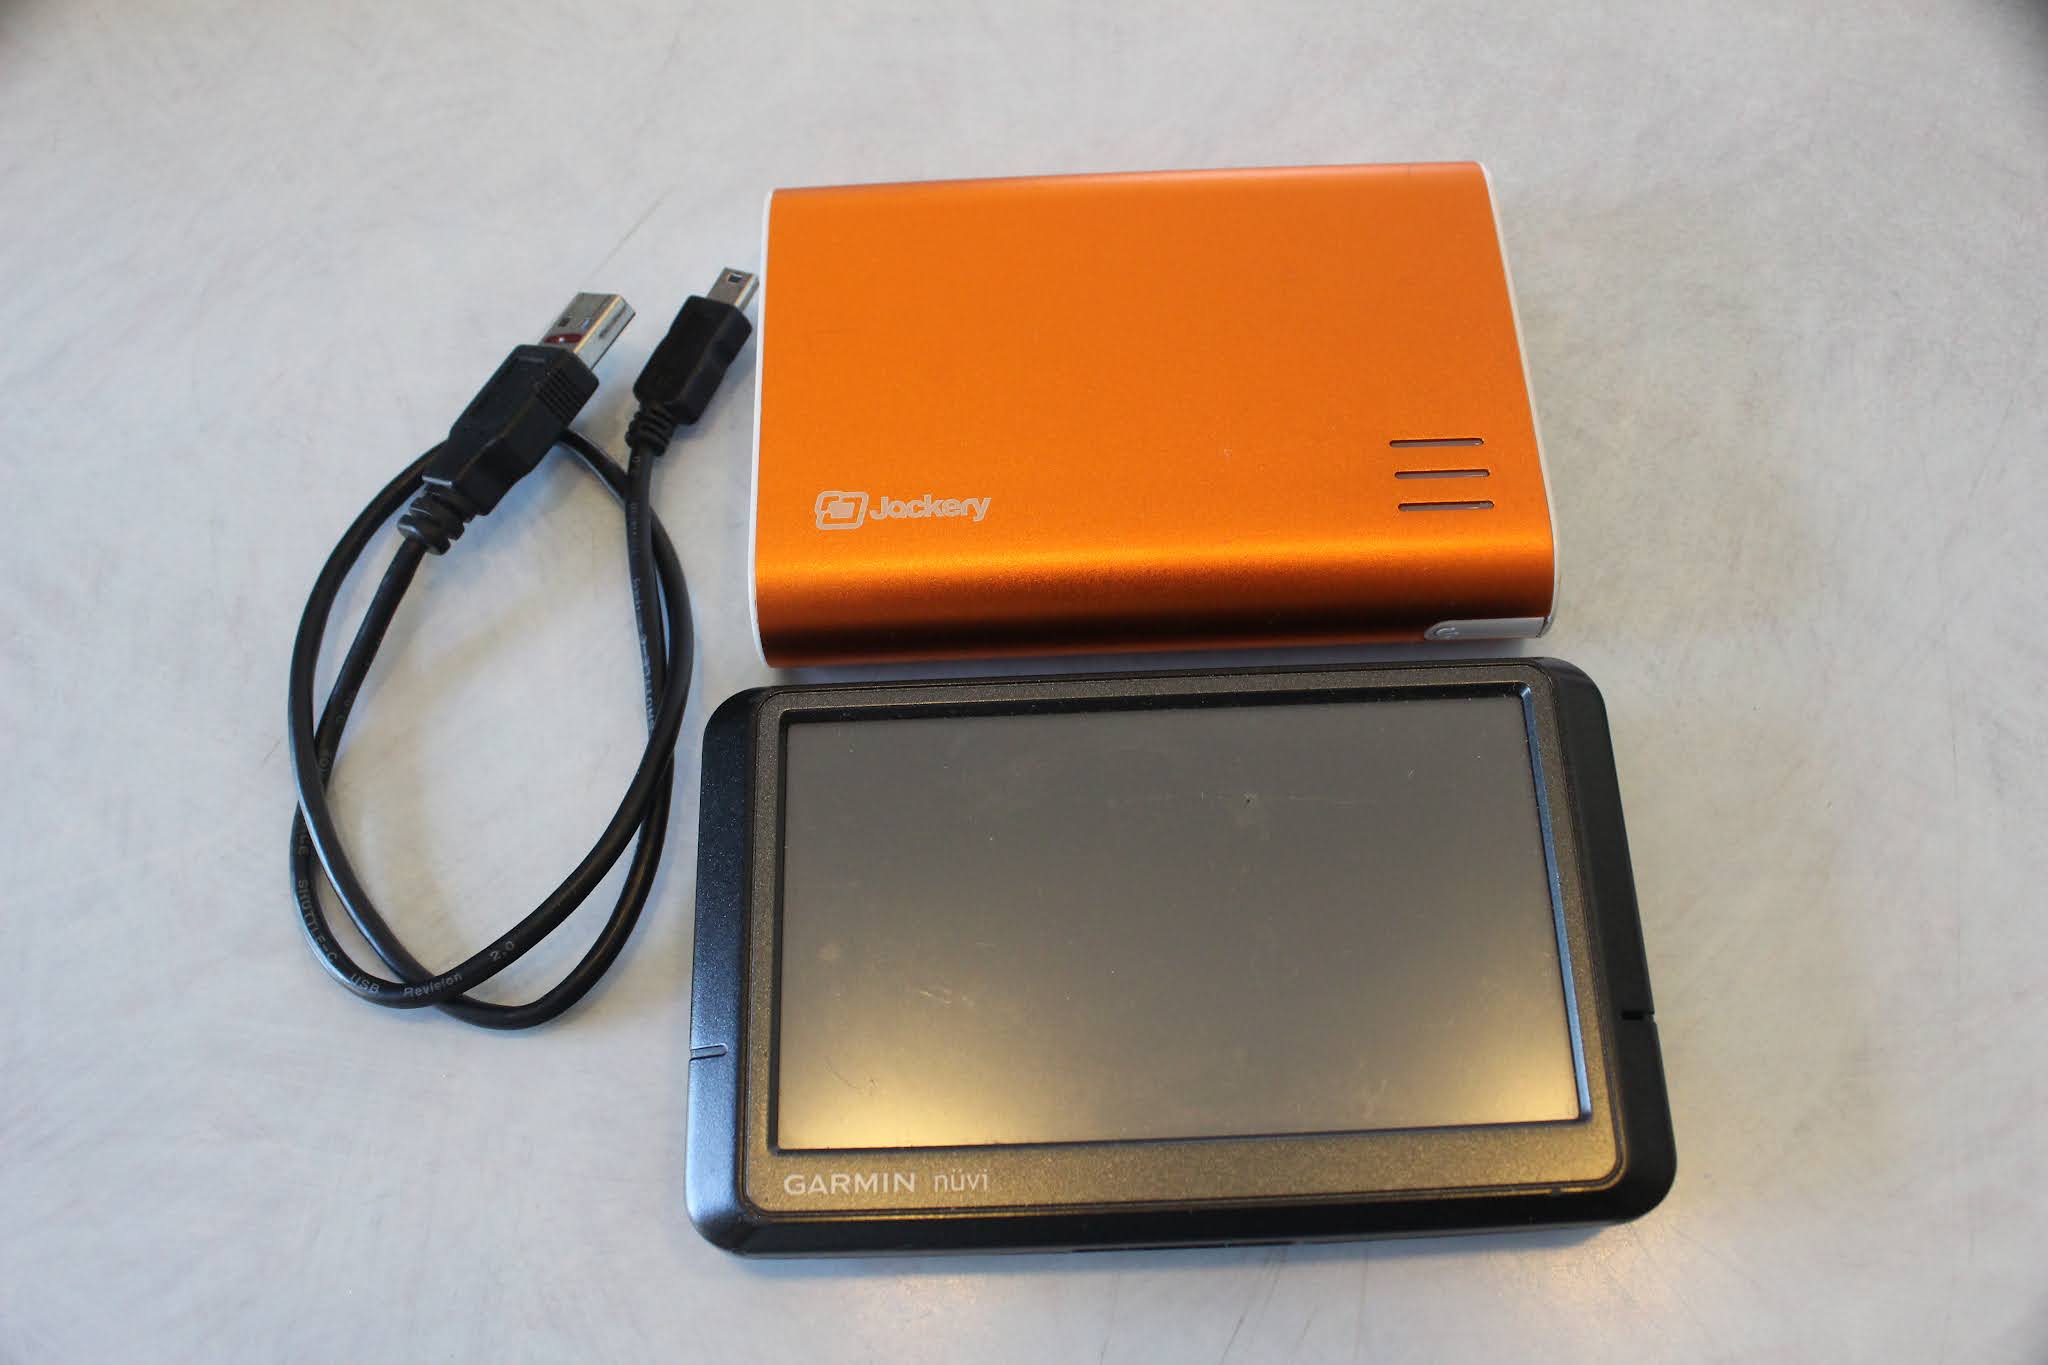
One of my favorite items and a necessity in my book, is my Jackery External Battery Charger.   I make sure it's fully charged before I go anywhere and it comes in very handy in case my GPS or my cell phone go dead.  I also have a Garmin GPS.  I mostly use this to mark the trailhead or where I parked my car.   It's a nice piece of equipment to have along in case you get confused in the woods and need to find your way back to your car.  

I always keep a small notebook and pen with me.  You never know when you might need it.


I love this Streamlight ProTac 1L flashlight!  It's 3 1/2" long so it doesn't take up much room but it packs a solid punch in terms of providing light.  It's super powerful and mine came with a little carrying case.


Next is my Go-Bag which says Geo Tools.   I use alot of this stuff when geocaching, but it's all things that come in handy anytime you're out on the trail.  It's just a heavy duty pencil case.
It contains a spare pair of reading glasses, a compass, a Coleman emergency poncho and a reflecting emergency blanket....


I'm extremely allergic to any type of sting, so I carry an Epi and Benadryl with me everywhere I go.  I also have an emergency whistle, a small mirror to use for signaling, a pill container filled with fire starter (cotton balls dipped in Vaseline) and a lighter.  The whistle has come in handy more than once - one time we were geocaching in the woods with my parents and we got separated.  We eventually found each other by using our whistles.


Also in this bag I have a sharp knife, a flint for fire starting and a survival knife....


I'm a huge fan of Ebags and this one is filled with toiletries...


Suntan lotion and bug spray....


Hand sanitizer, aspirin, Neosporin, lip balm and band aids...


My Go-Girl, toilet paper, and wet wipes....


My other Ebag contains clothing items...


A windbreaker with a hood, spray mace, and a couple carabiners..

 A  skull cap, a buff, a pair of work gloves and a bandana.  That bandana has come in handy more times - I particularly like it on a hot day because I wet it down and tie it around my neck....

I'm a fan of Lightload towels.   These things are great because they come in super small packages and take up next to no room.  The larger one can be used as a bath towel and the smaller ones are great for just about anything...


And last, but not least is my survival bracelet.  In an emergency I can untie it and have about 15 feet of paracord.


So that's my basic backpack and what works for me.  You may decide not to take some of the items and you may have others that you need.  A backpack is kind of person specific.  All loaded up, mine usually weighs between 10-15 pounds.  I've heard that the general guideline for backpack weight should be between 10-15% of your body weight.  I weight 108, so I'm within the guidelines and I've found this is a good weight for me to carry.   I grab my hiking sticks and I'm good to go.  Happy trails!!

As an Amazon Associate I earn from qualifying purchases...


Thursday, July 22, 2021

Product Review VacLife Air Pump Tire Inflator

I don't know about you, but when I'm on the road I worry about my tires going flat.  I recently purchased A VacLife Air Pump and it has already come in handy.  The VacLife Tire Inflator is perfect for both for Home (110V) and Car (12V).  It comes with an AC/DC Portable Air Compressor for Car Tires, Bicycles and Other Inflatables, a Digital Air Pump with LED Light, & Long Power Cords (VL708).


To begin, it's small, compact and lightweight.   It barely takes up any room at all but it packs a powerful punch.  This is everything you get, right out of the box...

The compressor itself...


Power cord for in-home use....

Power cord for on the road car use.....

Attachments for inflating balls, inflatable kayaks, air cushions and swimming pool items....


It also comes with a powerful LED flashlight...


It's extremely easy to operate.  Hook the clamp onto your tire and turn ON your car if using the 12v cigarette lighter plugs.   OR you can use your home 110v socket.    The DC and AC power cords of the portable air compressor are 9.2 ft and 5.2 ft.  


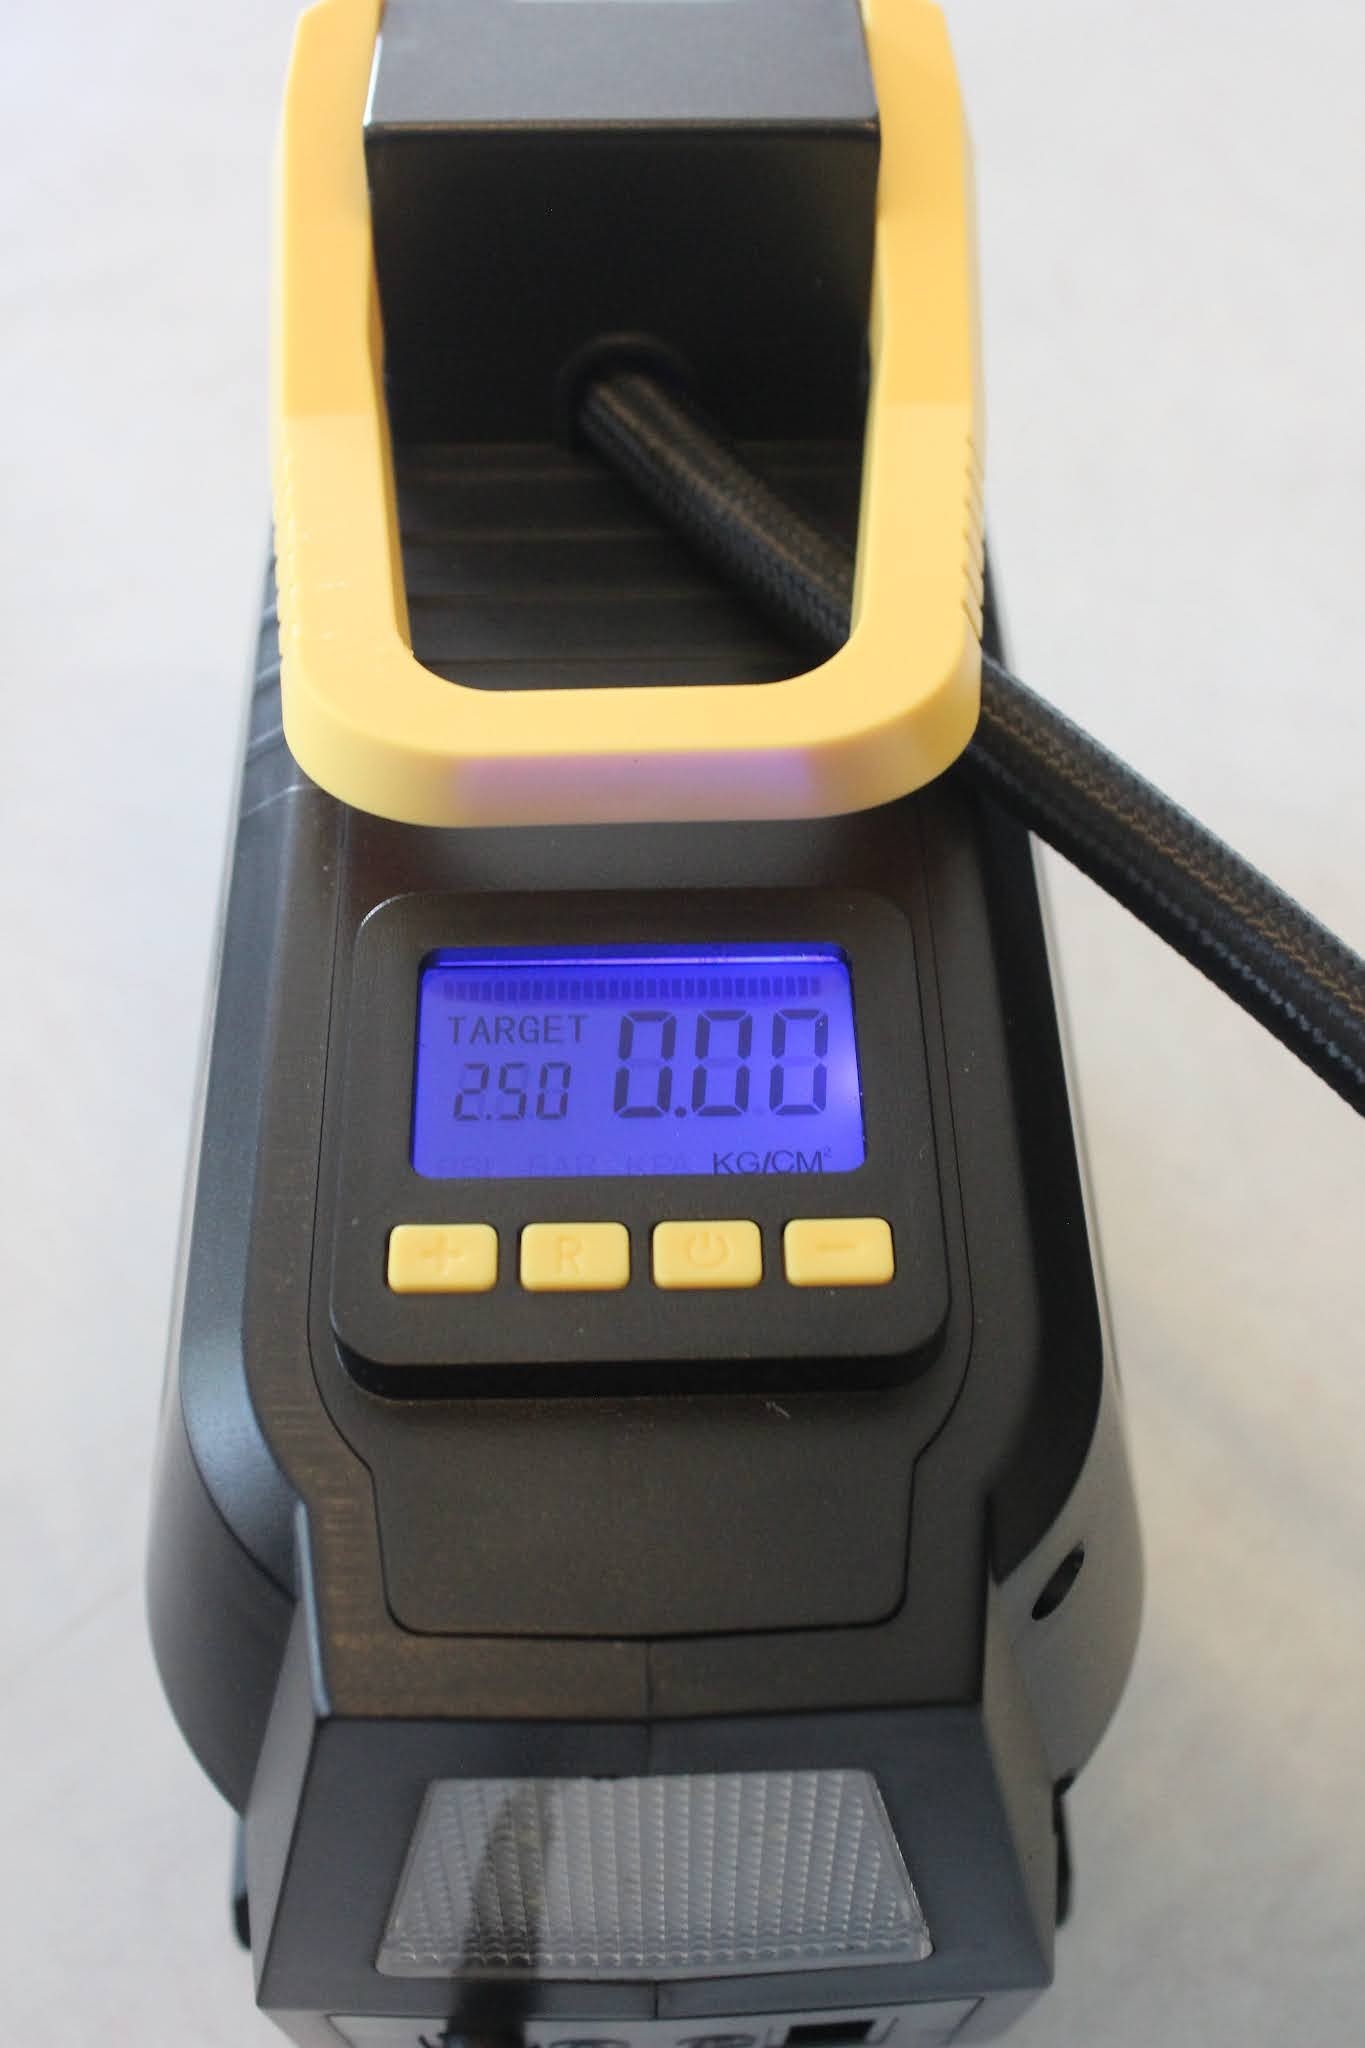
Input the desired target tire pressure for your vehicle.  In my case its 36...


Turn your VacLife on and it literally took less than a minute to inflate my tire to the proper pressure...


I like the digital readout so I can see the pressure going up.  The machine shuts off automatically when it reaches the target pressure....

This tire pump is suitable for cars and medium SUVs with tire width less than 245mm and bicycles with Schrader Valve. Any truck tires are not applicable.  I have a Dodge Durango and it worked perfectly!  Once I was finished I boxed it back up and put it in my trunk.  It gives me great peace of mind to have it with me.  You just never know when you'll need it.  It's a small price to pay if you've got a low tire and you're in the middle of nowhere.


Purchase one for yourself here.

As an Amazon Associate I earn from qualifying purchases..


Friday, July 16, 2021

Microwave Heating Pad and/or Ice Pack

 New in my ETSY Shop are microwave heating pad and/or ice packs.  They are filled with rice and come in both unscented or Lavender Scented.  They also come in 2 sizes - 

LARGE 14" X 5"

SMALL 6" X 6"

Nightmare Before Christmas...


Take a well deserved break and relax with this LAVENDER Heating Pad made with rice. This heating pad is sewn and filled by hand with love and care. You can either warm it up in the microwave or pop it in the freezer for several hours to get a soothing, cold pad! The Heating Pad is perfect for sore muscles, headaches, cramps, relaxation, sleep, and much more!


Instructions:
Microwave pad for 30 seconds at a time until warm. Microwaves vary, so heating time could take from 1 – 3 minutes to reach your desired temperature. Do not overheat – will cause burning.

Microwave Tips:
-Place on a microwave-safe dish to keep your heating pad as clean as possible!
-Fill a mug with a bit of water and microwave that with your heating pad to create steam, which is great for keeping the heating pad's filling hot and in top condition!

Cats and Kittens......


For cold therapy, place pack in a plastic bag and just pop it in the freezer for several hours.

To Clean:
Spot clean only with a damp cloth. Let Air Dry & repeat if necessary.

Dogs and Puppies....


Generous Size of Approximately
LARGE 14" X 5"
SMALL 6" X 6"

All Heating pads are made to order.


Disclosure: please follow the provided instructions in order to keep the heating pad at the correct temperature. Do not leave the heating pad unattended in the microwave for long periods of time. Snug Harbor Bay is not responsible for any issues that result from disregarding the provided instructions such as burns, damage to the product from extreme overheating, microwave damage, etc. Please use the heating pad responsibly.

For other unique items, please visit my ETSY shop.

Sunday, July 11, 2021

Outdoors Books I Recommend

 I love books!!  I don't know about you, but in most cases I prefer an actual book, something I can hold in my hands and open, sit and read, turn down page edges or use a yellow highlighter.   My books are loved and well used, read and re-read in some cases, marked up and treasured.   If you're an outdoors type of person, like I am, you are probably always on the look out for an interesting book that relates to your particular outdoors niche.   I've compiled  a list of many of my favorite "go-to" books and I thought I'd share them with you....

America’s Great Hiking Trails

After reading this book I dare you to tell me that at some point you didn't imagine yourself hiking at least a small section of one of these scenic trails.  Each of the eleven chapters is dedicated to showing what is unique to that particular trail.  Each trail receives star treatment as the author supplies pertinent information about its route, shares interesting historical tidbits and highlights particular spots of beauty.  Each trail offers something unique to its region and Ms. Berger offers up a host of factors such as communities, landscapes, environment and land use.  Every chapter gets a thorough description of history, a map, trail information, and extensive, glorious photos.  Each chapter concludes with special points of interest.  Are you strapping on your hiking boots yet?  This is one of my personal all-time favorites.....


In the decades since the trails' inception, it's the dedication of hundreds of individuals who were instrumental in the vision and building of the trail.  Learn the names of the people who fought for funding, blazed the trails, installed markers and maintained over 2000 miles of footpath.  If you've ever seen the iconic bronze plaque that marks the first northbound steps of the trail atop Springer Mountain, then you'll read about who posed for that plaque and what role he played.  The time it takes to hike the trail varies from person to person.  I will tell you that it ranges from 46 days to 46 years.  Did you ever wonder who was the first soul to hike the entire trail and the reason why he was on that trail in the first place?  My personal favorite story is the one about the first woman to thru hike the entire length.  She did it with a simple sack tossed over her shoulder and guess what, she was 67 years old!  You will have to read the book to learn more about her and others as well...


Complete Outdoors Encyclopedia is packed with over 1300 beautiful colored photographs and hundreds of illustrations.  It is the ultimate reference guide for anyone, of any age or gender, who wants to spend time in the great outdoors. 


This 8th edition of the guide has been published to coincide with the 100th anniversary of the National Park Service.  It's been completely redesigned with updated information and maps.  Did you know that there are 59 National Parks?  Pull out your notebook and start making plans because once you open the book, you're going to want to visit a large majority of the parks....


As a lifelong camper, hiker and nature lover, this is the type of book that I can truly appreciate.  Written by Guy Grieve, it showcases 100 essential skills for surviving in the wild with easy to follow explanations,  light humor and clear illustrations.....


Have you ever visited the Adirondacks?  Did you know that they cover more ground than Yellowstone, Yosemite and the Grand Canyon combined?  The Adirondacks: Season by Season focuses on the changing seasons and how they transform the landscape.


The Appalachian Trail spans 2200 miles and crosses 14 states.  Along the way you will experience thousands of species of plants and animals.  Follow the path which is marked by small white painted blazes.  Shelters are scattered along the trail where you can camp for the evening.  The trail crosses many roads that lead to towns along the way where you can stop, resupply, and indulge in ice cream or grab a much needed shower.   A thru-hike of the entire trail generally takes from 5 to 7 months.  But have no fear, you can access the trail from numerous locations and enjoy shorter hikes that will let you experience the trail.   Tailor trips that will only take you a day, a weekend, or a few weeks.  The beauty of this "mini edition" is that is it exclusively photographs.  It allows the viewer to sit and experience the trail and every page is a delight.  Footpaths beckon you to follow as they twist and turn into the distance....


The Complete Guide to Camping and Wilderness Survival by Vin Sparano contains 320 pages of in-depth coverage of tents, sleeping bags, footwear, camp kitchens, tools, backpacks boating and all-terrain vehicles.  It also features over 600 color photographs and illustrations that explain techniques for any camping/wilderness survival scenario....


 I have held a long fascination with all things relating to the Civil War.  When we travel we often seek out battlefields, museums and cemeteries, and proceed to soak up as much information as we can.  Civil War Battlefields: Walking the Trails of History contains in depth information on 32 key battlefields at 12 sites located in 12 states.  I couldn't wait to crack it open and I was not disappointed!


Click on the book titles to be taken directly to Amazon. As an Amazon Associate I earn from qualifying purchases

Tuesday, July 6, 2021

Keeping Your Standard Cooler Cold

Keeping your standard cooler cold for as long as possible is always a hot debate.  I've heard plenty of great solutions, so I thought I'd share some of them here as well as show you what I've done to help solve that age old question.

Personally I have 2 coolers that I take with me.  The first is a vintage Coleman cooler that I found several years ago at a garage sale.  This thing is a beast!  It's huge, measuring in at 28" x 15" x 16" tall....  


I love the red color and the top of it is a perfect place for my State sticker travel map.


The second cooler I take is my  SetPower Refrigerator/Freezer and it's been a game changer.  Sleek and efficient, it has the ability to be used as a refrigerator or a freezer.  It easily does the trick for both.  SetPower has 2 sizes and I splurged on the larger one.  You can plug it into your car for power or into a Jackery type unit if you have one of those.  


But back to the standard cooler and how to keep it cold.  Here's some pictures of my Coleman cooler and what I've done with it.  As you can see I lined it with Reflectix that I cut to size and just taped along the edges with duct tape...


I found this plastic insert at a garage sale and snapped it up!  It's just the right size for inside the cooler.


The left side of the cooler holds mostly my groceries - things like peanut butter, crackers, buns, chips, cookies, chocolate bars...  
 

I freeze quart and gallon size jugs of water and iced tea and place them inside the plastic insert.  I also throw packages of lunch meat and cheeses in the plastic bin.  The bottom of the plastic bin catches all the condensation as the ice melts.  I drink the water and tea from the jugs once it's all melted...


For me, this has worked perfectly and I usually get 5-7 days before the ice in the jugs is almost all melted.  Here's a few more tips for you....
  • Open your cooler as little as possible
  • Get it cold the day before you leave and then add fresh ice when you're ready to go
  • Use frozen food in the bottom of your cooler
  • Cover your cooler with a blanket
  • Keep it out of the sun
  • Line the inside of the cooler with Reflectix
  • Instead of bagged ice, use blocks of ice.  I freeze gallon water jugs and water bottles and use those.  An added advantage is that you can drink the water once it eventually melts
  • I've heard of people using dry ice but I've never personally done this
  • Keep soda in a separate cooler to minimize opening and closing your food cooler
So there you have it - Happy camping!

As an Amazon Associate I earn from qualifying purchases...


Related Posts Plugin for WordPress, Blogger...